
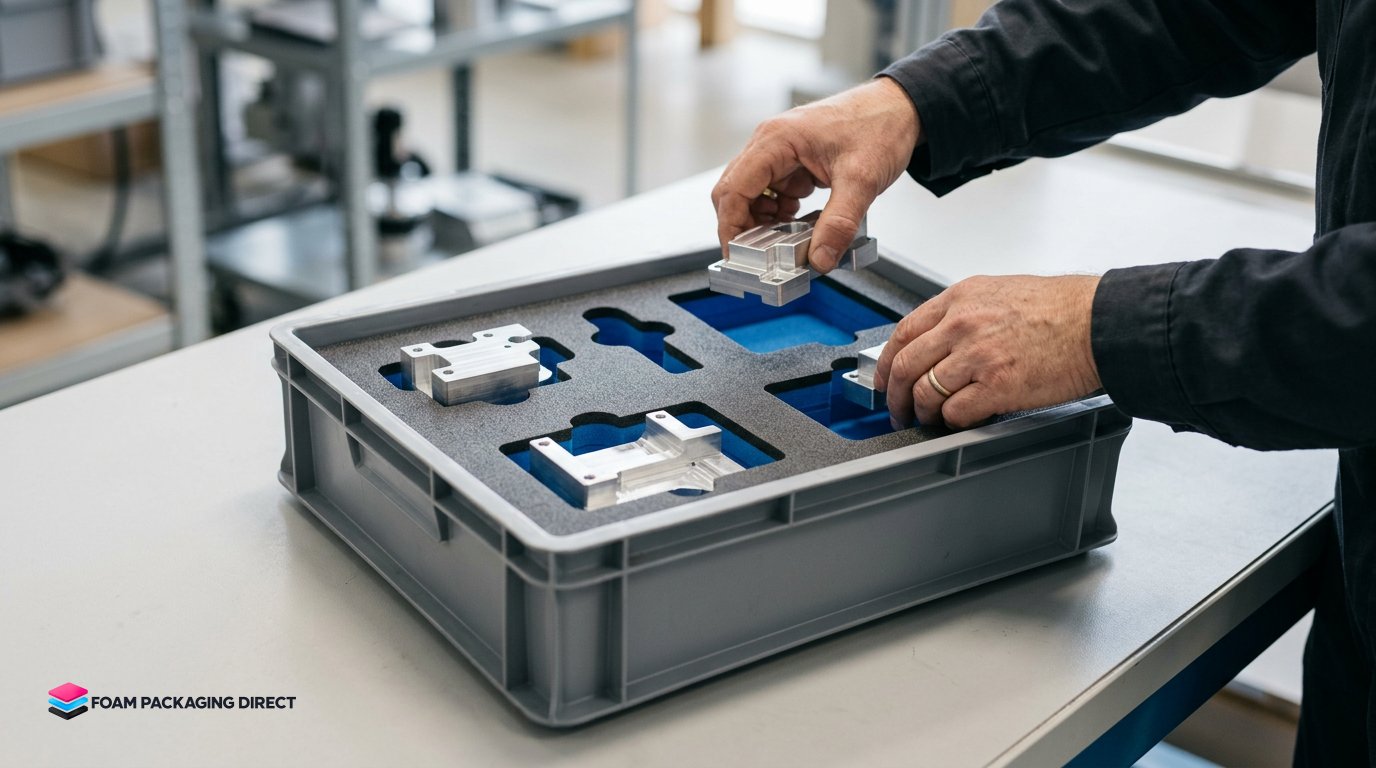
A tote insert that holds parts securely can still slow an assembly line if workers struggle to load or remove them. Effective custom tote inserts are designed around each part’s shape, weight, handling needs, and place in the production process. The aim is a practical fit that keeps components organized and makes every handoff easier.
Protection and separation are important, but line-side access and consistent placement matter too. Workers need to reach components comfortably and return them to the right pockets without unnecessary steps.
This article explains how part geometry, foam choice, ergonomics, and production coordination shape insert design. You’ll learn what information helps determine the layout, how design choices affect daily handling, and how to plan a tote or tray insert for your operation.
Key Takeaways
- Plan insert layout around how workers load, reach, and return each component during the production cycle.
- Match foam shape and density to part geometry, weight, fragility, and surface sensitivity.
- Choose an insert style that supports the tote’s dimensions and keeps components organized and accessible.
- Coordinate part details, tote measurements, and production requirements early to guide a practical design.
Handling, density, and ergonomic considerations
For assembly-line use, size each pocket and access point around the part’s handling sequence. The foam material, tote fit, and how parts are loaded all affect access.
Material Selection for Handling and Density
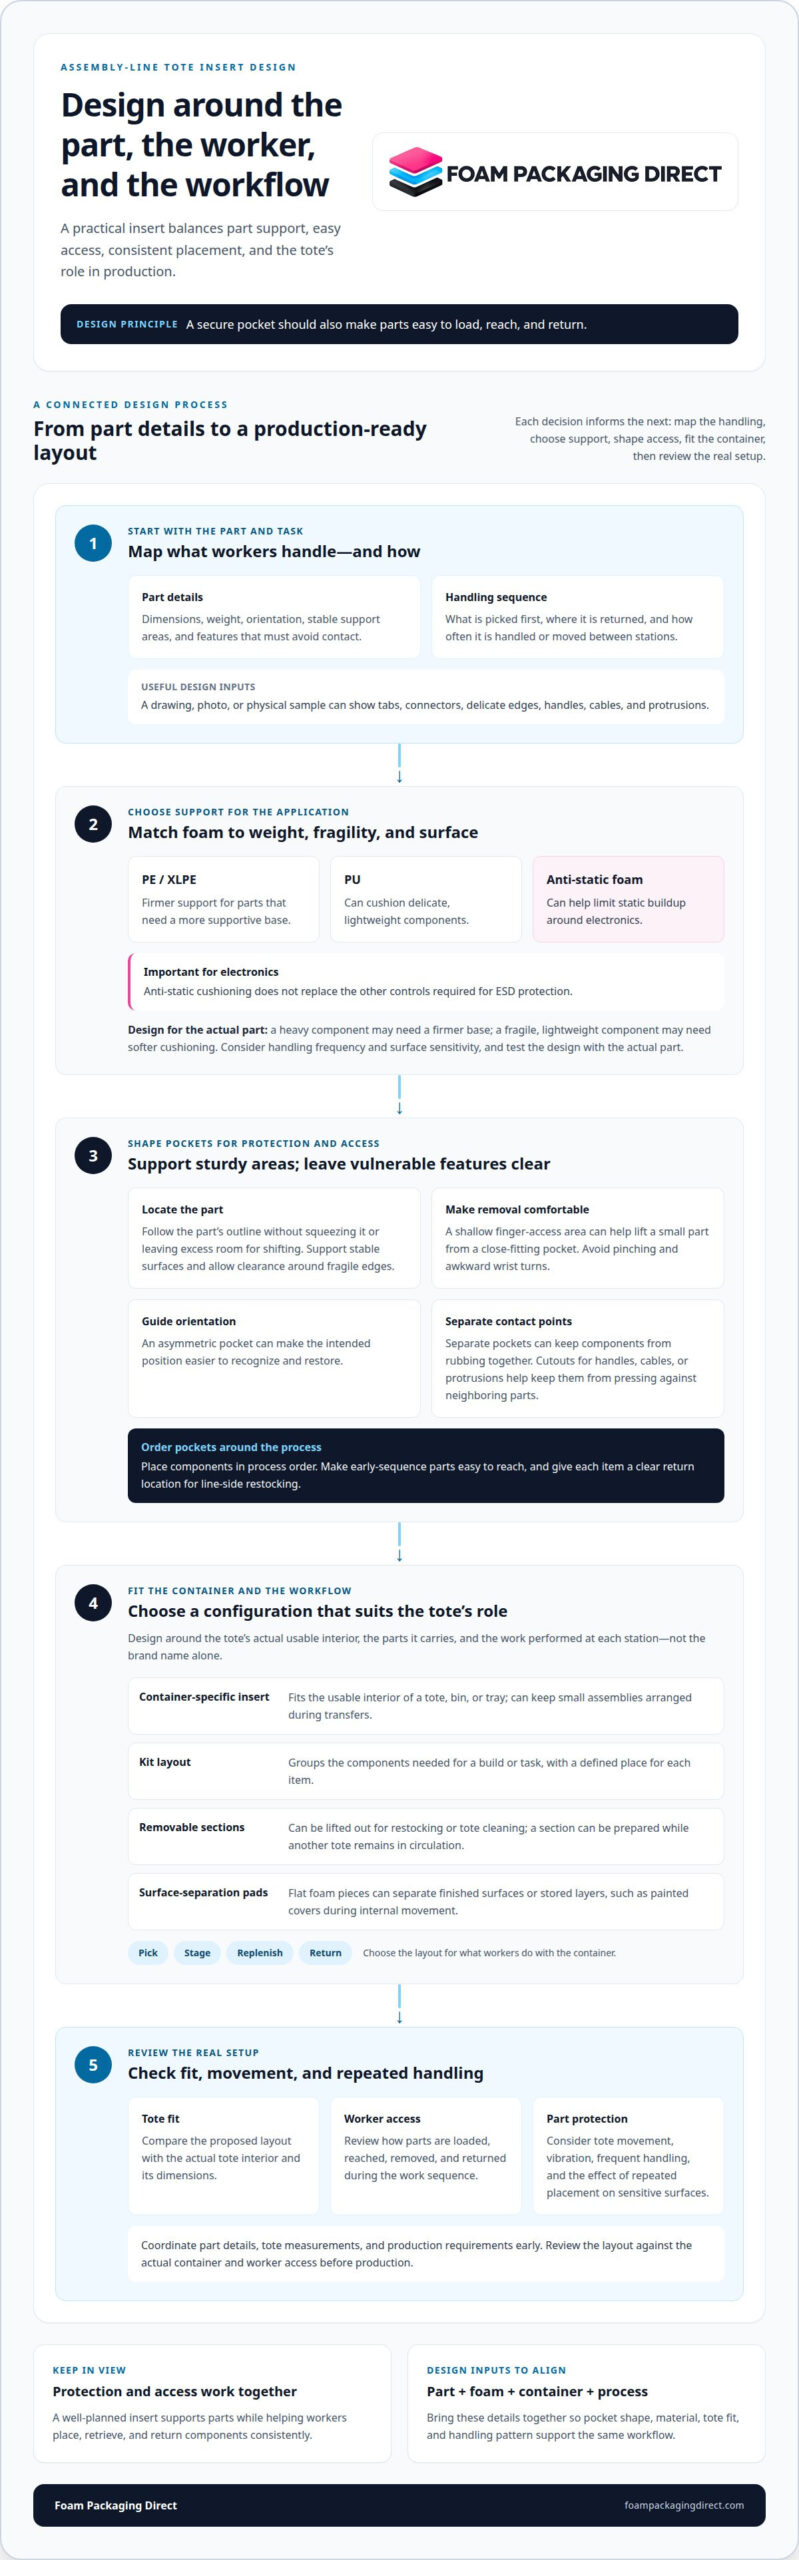
Choose materials according to part weight, fragility, surface sensitivity, and handling frequency. Polyethylene (PE) Foam and Cross-linked Polyethylene (XLPE) Foam provide firmer support, while Polyurethane (PU) Foam can cushion delicate, lightweight components. Anti-Static Foam can help limit static buildup around electronics, but it does not replace the other controls required for ESD protection. Match the material to the part and its production environment.
Fit Across Tote Brands and Models
The best insert for a tote brand or model is the one shaped to its actual interior and the parts it carries. Brand names alone don’t establish fit. For example, a listed Goyard organizer measures 15 by 5 by 7 inches, but that dimension is an example, not a universal specification. For assembly totes, design around the specific container, part layout, and access needs. Custom tote inserts should fit the tote and the work.
Design for the worker’s repeated movements. A component needed early in the sequence should be easy to reach, and its pocket should allow removal without pinching or awkward wrist turns. For example, a shallow finger-access area can help workers lift a small part from a close-fitting pocket. Separate pockets also make the return location clear during line-side restocking.
Foam firmness affects how securely a part is supported and how easily it can be removed. A heavy component may need a firmer base to limit movement, while a fragile, lightweight part may need softer cushioning. For surface-sensitive parts, consider how repeated placement and removal might affect the finish, and test the design with the actual part. Account for tote movement between stations too, since vibration and frequent handling can change how securely components need to sit.
Design coordination follows a practical sequence: map each part, identify its orientation, then place pockets in process order. A drawing or photo can clarify features such as tabs, connectors, and delicate edges. Review the layout against the actual tote and worker access before production. This makes the insert’s shape, material, and handling pattern part of one coordinated decision.
Shaped foam dunnage for complex or fragile components
Shaped foam dunnage uses cutouts to locate parts and limit contact during movement. For a connector with a delicate pin, a pocket can support the housing while leaving the pin clear. This keeps the stronger surfaces supported and reduces contact with features that could bend or catch. The layout should reflect how each part sits, moves, and leaves the tote.
Start by identifying stable support areas and vulnerable features. A molded housing may rest on its broad sides, while a narrow tab needs clearance. The pocket should follow the part’s outline without squeezing it or leaving excess room for shifting. Cutouts for handles, cables, or protrusions can keep them from pressing against neighboring parts.
Orientation matters on an assembly line. If a component must enter the next station in a particular position, shape its pocket to guide placement. For example, an asymmetric pocket can make the correct orientation easier to recognize and restore. Separate pockets also keep related components from rubbing together, such as a metal bracket and a finished plastic cover.
Consider contact points as carefully as pocket shape. Fragile edges may need clearance, while sturdy surfaces can provide stable support. Foam can also separate parts from the tote bottom and from one another. For electrical components, Anti-Static Foam can help limit static buildup, but it does not replace other ESD controls required by the full packaging system.
Useful design inputs include a part drawing, photo, or physical sample, along with dimensions, weight, orientation, and surfaces that must avoid contact. Review the proposed layout against the tote and the sequence of assembly tasks. These details help turn complex geometry into custom tote inserts with pockets designed for both handling and protection.
What types of custom tote bag inserts are available?
For assembly operations, the right insert depends on the container, workflow, and how components are grouped. A tote insert can organize parts moving between workstations, while a tray insert can present parts at a bench or feed area. Start with the container’s role, then choose a layout for picking, staging, replenishment, or return.
Common configurations include:
- Container-specific inserts: These are designed around the usable interior of a tote, bin, or tray. For example, a line-side tote can keep small assemblies in a consistent arrangement during transfers.
- Kit layouts: A kit layout groups the components needed for a particular build or task. It can give each item a defined place, helping workers see whether the set is ready for use.
- Removable sections: Separate insert sections can be lifted out for restocking or cleaning the tote. A replenishment team can prepare a section while another tote remains in circulation.
- Surface-separation pads: Flat foam pieces can sit between finished surfaces or between stored layers. For example, a pad can separate painted covers during internal movement.
Choose a configuration based on how the tote moves through the facility. A tote traveling between several stations may need a layout that keeps components grouped during handling. A tray used at one workbench may prioritize quick visual access. Identify whether workers pick, stage, replenish, or return parts in each container.
Order quantity and handling patterns also influence the design. A recurring kit may benefit from a consistent arrangement that supports repeatable packing. A tote shared across product variants may need a flexible layout. Include the part groups, container type, and intended station in the design discussion to define an insert format suited to the production flow.
Commercial inserts should fit the operating routine, not the dimensions of a consumer organizer. For example, an assembly cell handling a bracket set can group related components for handoff to the next workstation. The arrangement should make its intended use clear to operators and replenishment staff without adding unnecessary steps.
How do I measure a tote bag to choose the right insert?
Measure the tote’s usable interior, not its outside dimensions. Record its length, width, and height, and label these as the tote measurements, not the insert measurements. This distinction helps prevent a layout drawing from assigning container dimensions to the foam. Use inches or centimeters consistently throughout your notes.
- Measure the base. Record the inside length and width where the insert will rest. If the tote tapers, measure the base and the opening separately. For example, a wider opening doesn’t mean a rectangular insert will fit the narrower bottom.
- Check the interior height. Measure from the base to the lowest point that limits insert height. Include handles, seams, or closures if they reduce usable space. Note whether the tote needs to close with the insert installed.
- Capture the tote shape. Identify rounded corners, sloped sides, internal pockets, and other obstructions. A simple sketch can show where each feature sits. Photos from above and from the side can clarify a non-rectangular interior.
- Measure the parts. Record each component’s length, width, and height, plus its preferred orientation. A drawing or photo can show tabs, connectors, or edges that need clearance.
Share dimensions as length × width × height, and label each set clearly. For example, mark the container measurements “tote interior” and the component measurements “part A.” This keeps the container, insert, and part figures distinct during design. If dimensions use centimeters while a drawing uses inches, label each unit rather than mixing them.
For assembly use, explain how parts sit in the tote and how workers remove them. A pocket designed for a component’s resting position may need a different shape from one designed for upright storage. Note the number of component types and the desired arrangement too. These details connect tote fit to a practical insert layout.
To request a quote, provide the tote’s interior dimensions, part dimensions and weight, quantity, shipping ZIP code, and available drawings or photos. Include existing tote dimensions and any special protection requirements so the design can account for the actual container and application.
Foam Packaging Direct: Custom Foam Inserts
Foam Packaging Direct designs and manufactures custom tote and tray inserts around your container and parts. Custom-cut pockets can organize components, support repeatable placement, and help limit movement between workstations. Each new design includes a prototype or sample for approval before full production.
Consider an insert when loose parts shift, workers need clearer component locations, or the current layout makes removal awkward. Product shape, weight, surface sensitivity, tote dimensions, and production sequence all guide the design. Drawings or photos can help show part features and the desired orientation.
To request a quote, provide the tote’s interior dimensions, product dimensions and weight, order quantity, shipping ZIP code, and any available drawings or photos. Include special protection or handling requirements. Contact Foam Packaging Direct to discuss an insert for your production needs.
Put the Insert Design Into Motion
A well-planned tote layout can do more than store parts. It can connect how components are organized at one station with how they move to the next. Treat the insert as part of the production workflow, with clear locations and practical access for everyone handling the components.
Foam Packaging Direct offers custom foam inserts, foam end caps, and foam sheets and pads for manufacturing line cushioning for related protection needs. Share the intended use, part and tote details, quantity, shipping ZIP code, and any drawings or photos when requesting a quote. These details help connect the design requirements to the right packaging format.
Ready to plan custom tote inserts for your line? Contact Foam Packaging Direct to discuss the application and request a quote. A clear starting point can make the next design decisions easier.
Frequently Asked Questions
What are custom tote inserts and what are they used for?
Custom tote inserts are fitted organizers that hold components in defined positions inside a tote. In production, they can separate items by assembly stage, such as keeping a housing apart from its matching hardware. Workers can return each component to its assigned pocket between tasks, making tote contents easier to identify and manage across workstations.
Where can I buy custom tote inserts or order them made to size?
Foam Packaging Direct makes tote inserts to fit existing containers and component layouts. Each new design includes a prototype or sample for approval before full production, and designs are kept on file for consistent reorders. To start a quote, share the tote or tray, intended application, and any drawings, photos, or physical samples that show the parts.
What are the best custom tote inserts for popular tote bag brands and models?
Choose an insert designed around the tote’s usable interior, the parts it carries, and workers’ access needs. A brand or model name alone does not establish that the insert will fit.